You want to insulate your shed, right? Good call. Whether it's for a workshop, a home office away from the main house, or just protecting your tools from our brutal Texas summers and the occasional winter chill, insulation makes a huge difference. As a contractor who's seen a lot of sheds around Arlington, I can tell you it's a project that pays off.
Before You Start: Planning Your Shed Insulation
First things first, what's your shed for? That's going to dictate how much insulation you really need. If it's just storage for a lawnmower, you might not need to go all out. But if you're planning on spending hours in there tinkering or working, you'll want it comfortable year-round. Think about the R-value – that's the insulation's resistance to heat flow. The higher the R-value, the better it insulates. For a shed you'll be spending time in, you'll want something decent, especially with our long, hot summers here in North Texas.
Next, check your shed's structure. Is it sealed up tight? Insulation won't do much good if you've got gaps and cracks letting air in and out. Look for daylight around doors and windows. Seal those up first with caulk or weatherstripping. You might also want to consider a vapor barrier, especially if you're going with something like fiberglass batts. This helps prevent moisture from getting into the insulation and causing mold or reducing its effectiveness. Our humidity can be a real pain, so don't skip this step if you're using certain materials.
What kind of insulation are we talking about? You've got a few options:
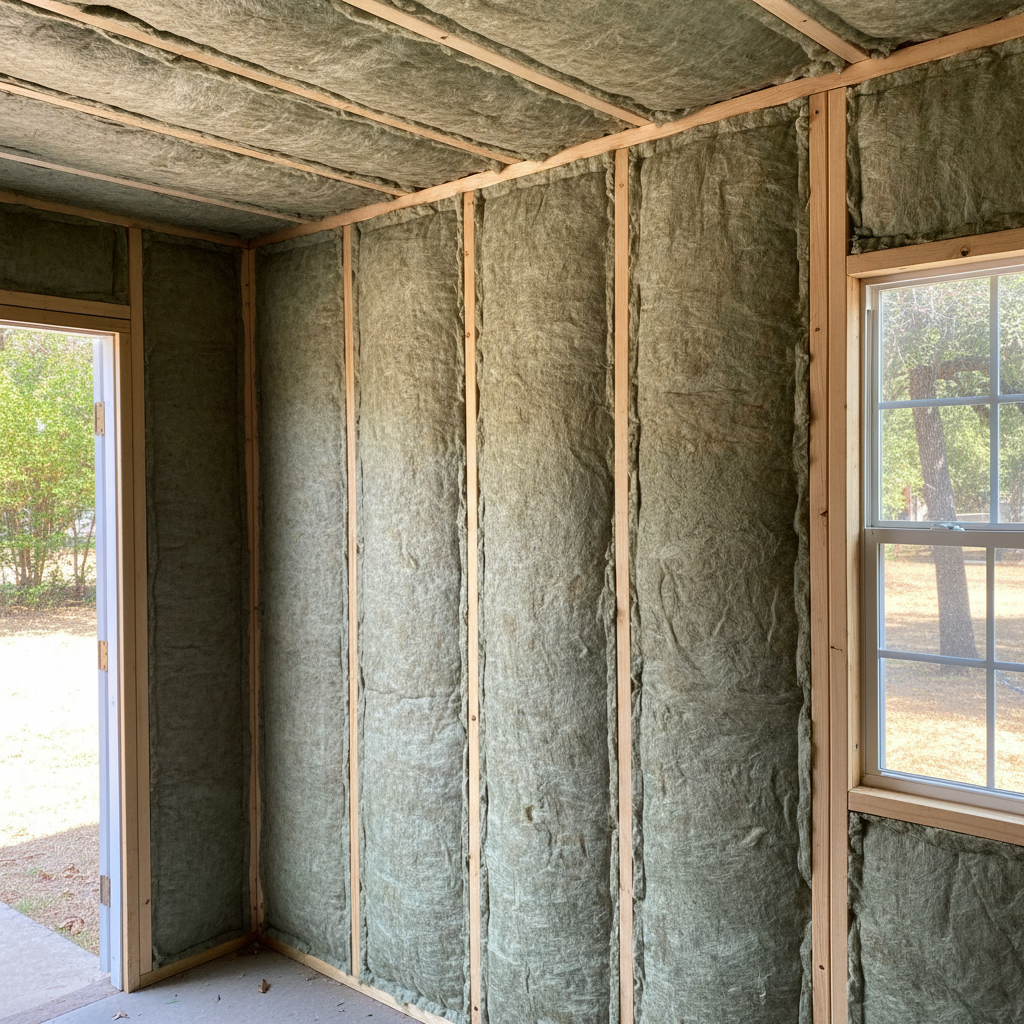
- Fiberglass Batts: This is what most folks think of. It's affordable and pretty easy to install yourself between studs. Just make sure you wear gloves, a mask, and long sleeves – that stuff can be itchy.
- Rigid Foam Boards: These are panels of foam like XPS, EPS, or polyiso. They offer good R-values for their thickness and are moisture-resistant. You cut them to fit and secure them.
- Spray Foam: Now, this is where you get the best seal and highest R-value per inch. It's fantastic for sheds because it gets into every nook and cranny. However, it's usually a job for a professional, especially if you want it done right and safely.
- Mineral Wool: Similar to fiberglass but often denser and more fire-resistant. It's a good option if you can find it.
During the Project: DIY vs. Calling a Pro
Okay, so you've got your plan. Let's talk about installation. If you're going with fiberglass batts or rigid foam boards, you can absolutely do a lot of this yourself. It's pretty straightforward: measure, cut, and fit. For batts, you just friction-fit them between the studs, joists, and rafters. Make sure they fill the cavity completely without being compressed. Compression reduces their R-value. For foam boards, you cut them snugly and might use a little expanding foam sealant around the edges to seal gaps.
Don't forget the ceiling and floor! Heat rises, but it also comes up from the ground. Insulating the floor, especially if your shed is raised, will make a big difference. You can use similar materials under the floorboards or between floor joists.
Now, when should you call someone like us at Arlington Spray Foam Insulation? If you're looking for spray foam, that's almost always a professional job. It requires specialized equipment, training, and safety gear. Trying to DIY spray foam can be messy, wasteful, and even hazardous if you don't know what you're doing. Plus, a pro will ensure you get a consistent, airtight seal, which is crucial for maximum efficiency. If your shed's got a lot of weird angles or hard-to-reach spots, or if you just want the absolute best performance, a professional installation is the way to go.
After the Insulation: Finishing Up and Maintaining
Once your insulation is in, you're not quite done. You'll want to cover it up, especially fiberglass batts, with an interior finish. Plywood, OSB, or even drywall will protect the insulation and give your shed a finished look. This also helps with air sealing and makes the space more comfortable. Make sure to seal any penetrations for electrical outlets or light fixtures with caulk or foam.
Keep an eye on your shed over time. Check for any signs of leaks or moisture intrusion. Our crazy weather, especially those pop-up thunderstorms we get in spring, can be tough on outdoor structures. If you see water getting in, address it immediately. Wet insulation is useless insulation, and it can lead to bigger problems like rot or mold.
An insulated shed is a game-changer. It'll be cooler in the summer, warmer in the winter, and your tools and projects will thank you. Whether you tackle it yourself or bring in the pros for a top-tier job, it's an investment that'll pay dividends in comfort and utility for years to come.